

I am writing this in preparation for my next kayaking overnight trip coming up next month. This is a shorter trip for me, just one night – but the focus of this trip is the two friends that are coming that have never camped out of their kayaks.
Even though this is a kayaking trip, this article does translate well for general camping, bikepacking, backpacking and also packing by horse. Weight is weight, space is space. Backpacking is the smallest space with the most weight limitation, then bikepacking, kayaking and finally packing with horses.
I will be talking about a lot of different gear that I use. Here is an Amazon List for most of the gear in this article. I’ll try to make sure that all the equipment is listed for you to view and purchase if needed. If you’re trying this out for the first time, you might consider renting some or all of your gear. Here is a previous article that covers this topic.
Let get started: The most important thing to remember is always, always, expect the unexpected! Next, think about bringing what you need to be safe and comfortable if you have a woobie and you need it to sleep at night, add it to the “bring it” pile. Once you have everything you “want” to bring, you’ll then be faced with the challenge of selecting what you “can” actually bring.
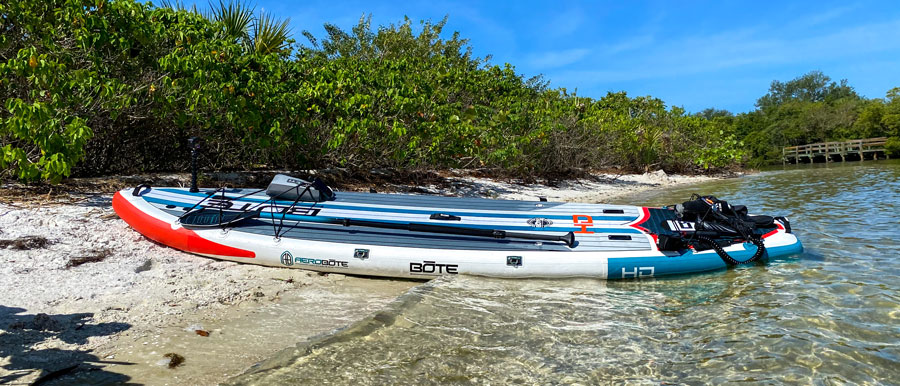
Obviously, you’ll need a kayak. But you need to know your kayak, it’s available capacity and capabilities. Not only storage capacity, but the maximum weight it can support. The number of storage locations and hatch opening sizes. Longer kayaks can handle more weight and have more storage. If you have a SUP, Canoe, or you’re a large opening cockpit area you, need to think about how to keep everything together, balanced, and dry. A couple of size appropriate waterproof duffle works excellent for this.
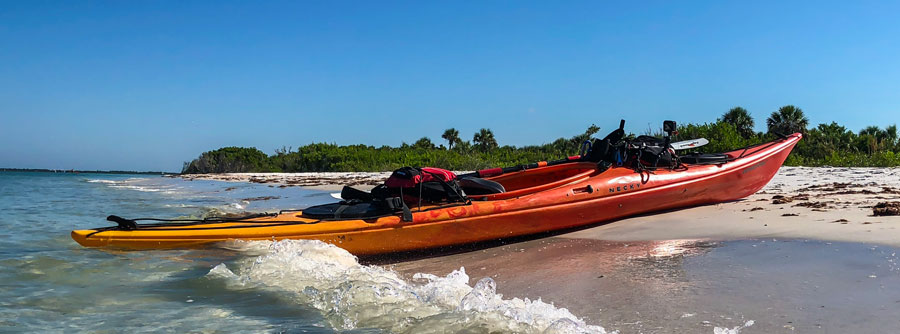
Let’s look at a live example: I have a Necky Manitou 14, and it has 113.6L / 6,932 cu in (about 30 gallons) of usable storage space in two locations, one forward and one aft. The bow hatch is 7in x 14in, and the stern is 10in x 16in, The stern compartment is larger than the bow, I’ll want to pay close attention to the weight I store in each, as I don’t want one side heavier than the other and causing handling issues. I also need to note that the cabling for the Skeg runs right through the opening of stern the hatch, limiting the size of items I can load in there. Since my kayak can support up to 325 pounds of total weight and I’m 235 pounds, I would be able to store an additional 90 pounds of gear – plenty for several days of camping.
There are many must-have accessories when kayaking, but overnight trips require a little more for those just-in-case situations.
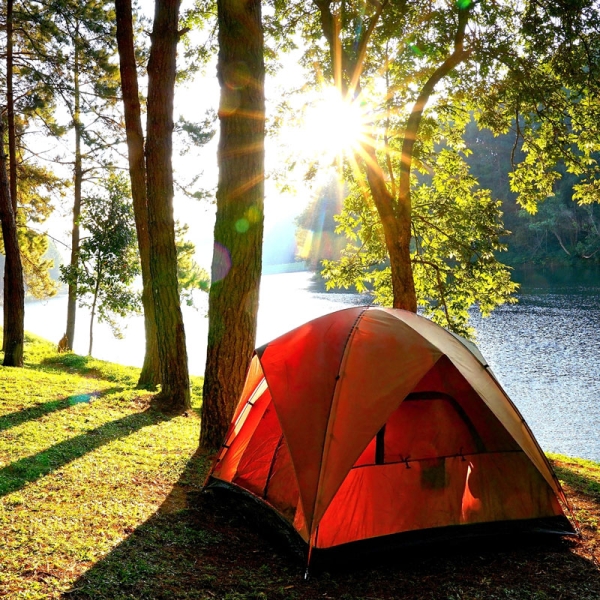
Provided there are no accommodations (cabin, room, hut) available along your route, you’ll want to consider bringing something to keep out the weather and smaller critters. There are numerous tents available, and you need one that will fit you and your personal gear, is light and compact. Take in mind your location, time of year and weather conditions when choosing the right one to bring.
A comfortable rejuvenating night’s sleep is essential for every overnight trip. Like your tent, your choice of sleeping bag needs to be made with each layover location, time of year and weather in mind. They should be rated for a minimum of 20 degrees below the lowest temperature you’re expected to encounter.
This comes without saying; we are all adults and no longer need mama to dress us, we get that. But always want you to remember the “Big Three”; Location, Time of Year and Weather. You need to bring clothes that you can layer to accommodate a minimum of 20 degrees below the lowest temperature you’ll expect to encounter. Bring clothes for your time in the kayak, at camp and for sleeping. This includes shoes & jackets, walking around camp in wet clothes and water socks just sucks!
Note: Depending on your trip, you may have time for other excursions, like hiking or climbing, fishing, etc., appropriate apparel for these activities should be considered.
This is SUCH a personal preference, so I’ll give you my opinion as it relates to me! Things I have learned over the years; protein and calories are King, especially on longer legs of your trip. Plan and pack for each meal separately to make finding things much more easily.
Shorter trips provide the luxury of having more room and bringing fresh ingredients. When properly wrapped, frozen and stored, one can bring raw meat (chicken, steak, fish) and vegetables for 2-3 dinners (I’ll discuss “how” in a separate article). For longer trips, you’ll want to think about storage space and likely more vacuumed pack dehydrated meals.
One of the biggest debates where food is concerned is Hot vs. Cold. Whether on a short trip or long, I personally prefer hot meals as much as possible – especially for
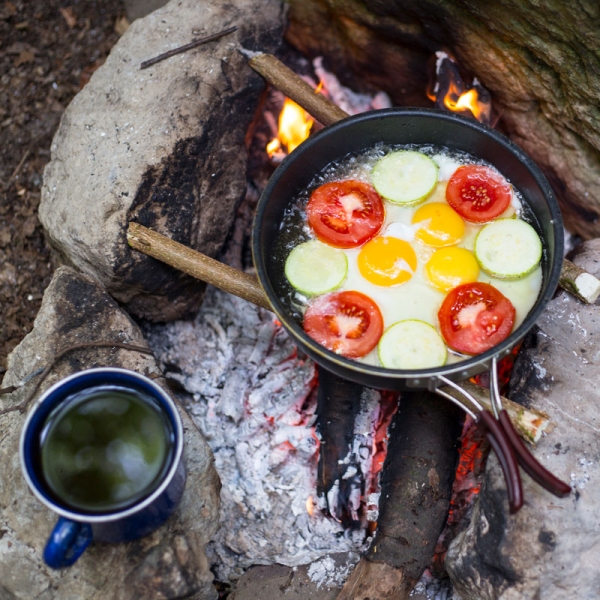
dinner. I always plan for hot meals but will bring an extra cold meal in case I can’t get a hot meal in. Breakfast is usually something cold, lunch is a toss-up. If I know I am taking a break for lunch in the middle of a long leg, I’ll try to get in a “quick” hot meal to refuel. If it’s lunch in the kayak, it’s always cold.
Select food for fuel vs. nutrition: I want to cover this just a bit here because there are likely first-timers or beginners extending their regular activity output for the first time to include at least one night of camping. We all try to eat right as best as we can, some better than others. But this is not the time to count calories – at least not in a conventional way. When you’re on a multi-day adventure, you’ll be burning far more calories than you do on a single day activity. You need to replace those calories, not only while kayaking, but you’ll need to load for the next days’ output – fail here, and your trip will end far quicker than you expected. Plan for foods that are high in protein and loaded with good calories. If it’s hot and you’ll be sweating more than average, higher sodium in your meal is likely in order. You might also consider adding electrolytes to your drinking water.
Here is an example of a day of food I will be bringing for this upcoming trip.
Breakfast: Hot biscuits and gravy, French Pressed Coffee.
Lunch: Summer Sausage, Stick Cheese, Olives & Crackers.
Dinner: Fresh boneless chicken breast, dehydrated Chicken & Rice.
Dessert: Dehydrated Apple Crisp.
Snacks: Trail mix including dehydrated fruit, raisins, a verity of nuts and M&Ms.
Make sure to bring along the needed condiments, spices, salt & pepper to season your meals. I have French Press for the JetBoil and bring coffee on every trip. Teas and powder sports drinks also break up the monotony of plain water.
I like Mountain House (and other) prepackaged dehydrated meals because they have years of experience designing the proper balance of ingredients for these high output activities. I don’t have to do the work figuring out all the numbers, they are simple to make, and they actually taste great – especially if you can add fresh meat to the mix!
When thinking about what you want to bring, think about this: What you pack in, you need to pack out. This goes without saying, but look at how each item is packaged. Canned food contains heavy and bulky cans. If you

want to bring something like canned Beef Stew or Raviolis, take them out of their cans and freeze the contents in Ziploc bags. If you’re going to bring boxed Kraft Mac & Cheese (one of my favs), take it out of the box and put it in a Ziploc bag. I prefer the Freezer style Ziplocs as they are generally thicker and protect my food better.
Side Note: Sometimes I’ll bring along alcohol (not this time), and that’s fine for some situations. Just remember that alcohol dehydrates the body requiring you to drink more fluids, meaning you need to carry more fresh water than you might usually.
Staying hydrated is essential. You must drink plenty of water throughout the whole trip, both in and out of your kayak. For day trips bring a big water bottle and your usually good to go. However, full-day and multi-day trips are entirely different. You’ll need to consider how much you’ll need for drinking, for cooking, and rehydrating your meals. How you’re going to carry what you need, how you’ll access your drinking water while in your kayak and what freshwater sources are available along the way.
It’s safe to say that since your kayaking, you have access to some kind of water.
The questions is, is it drinkable straight – not likely! I always assume that all rivers and lakes are not drinkable straight from the source. Therefore you need to carry enough with you (short trips) and/or be prepared to filter the available water.
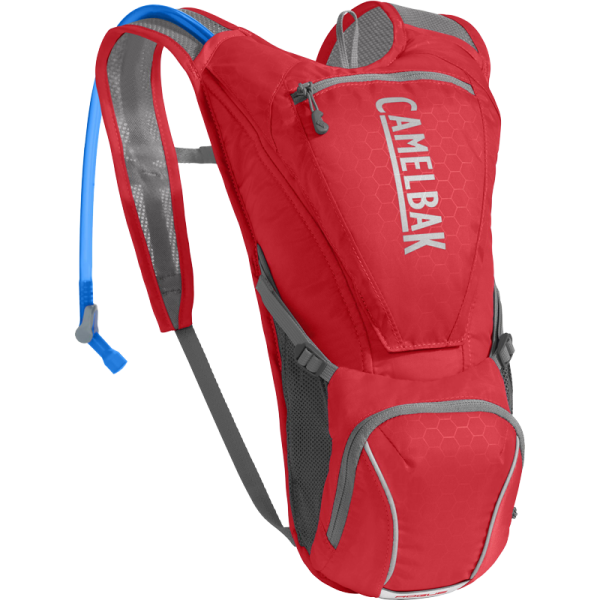
On longer day trips and any overnights, I always carry my drinking water in a CamelBak that I either wear or keep right behind my seat. The size I bring (2L or 3L) depends on my route and distance between sources. On overnights, I also carry a Katadyn Hiker Pro pump (formally PUR) which comes with the with the Katadyn Pro Micro Filter, even if only one night out. I also bring a 5 or 10-liter collapsible water tank (super thick bag) filled with fresh water, the size depends on my needs, each leg, and available weight & space. Keep in mind that 5L (1.3gal) of water weighs a little over 10 pounds.
I am not a fan of the pills or liquid treatments. While they will kill most bacteria and viruses, you still have all the “crap” from the water floating around. The only way to get rid of that is a filter. If you’re looking into filters, make sure that it will also filter out bacteria like Klebsiella terrigena and protozoan cysts like Giardia and Cryptosporidium.
Side note: At this time I am unaware of any reasonable way to distill or filter seawater, so it’s best to make sure that you can carry all that you need between freshwater sources.
The Kitchen: Cooking & Eating
There is a verity of all-in-one contained cooking systems that are designed for lightweight and take up as little space as possible. If you’re looking at hot meals, you’ll need at a minimum, a burner & fuel, a pot, and a spork. Too easy right… not so fast!
I am a big fan of the JetBoil systems. These are lightweight gas-fueled portable stoves with built-in cooking/eating/drinking cups used primarily for backpacking and lightweight camping. The nice thing is that everything, including the fuel, packs into the cooking cup making storage a breeze. There are many different accessories for the JetBoil as JetBoil owns this space in the outdoor gear market. The one drawback is they are expensive compared to other items grouped together! The very basic JetBoil system starts at $80 not including fuel and some top $400. However, this is one area that you do

get what you pay for. They are incredibly efficient and very durable. If taken care of, you’ll never need to replace them. My oldest JetBoil is well over 10 years old. All I have had to replace was the igniter, but that’s about the extent of it.
Here are some other options. I do have some of these items and use them on occasion, but usually in conjunction with the JetBoil, however, if you’re on a budget make for an excellent lightweight cooking set. Start with the Etekcity Ultralight Portable Stove, it’s very tiny, very light and only $14 bucks! You can add a GSI 1.1 Aluminum Boiler for $30 and some fuel and your set. FYI: The burner and fuel will fit into the GSI pot for storage.
If you have the room and want to take your cooking to the next level, here are some recommendations.
This Article is very interesting and also helpful.
Thanks admin


Leave a Reply